We have a garden container in front of our house. We planted creepy floxx there and it didn't do well. We had some marigolds left over and thought we'd put those there. Well they all got eaten. We thought maybe a squirrel or a raccoon. Turns out rolly pollies like tender young marigolds. I didn't know they would go after any plants. I thought they only ate dead wood. Oh well. I guess I need to find a plant to put there that they don't like to eat since we have soooooooo many of them living in that flower bed.
Did you know rolly pollies could be white? I've seen plenty of grey ones and even some that were grey with yellow spots but never white. Well, never until now. I don't know how rare these are but check out these crazy pics.
This little guy (or gal) was the same size as a full grown rolly polly. You could see just a little color from it's internal organs and the black of it's eyes.
Some sources say they are white after molting. However arthropods apparently don't normally molt all at once and this little guy was completely white. From the tip of it's antenna to the end of ever tiny leg and it's entire underbelly as well.
Things you might not know about rolly pollies:
They are also called pill bugs, wood sow, wood louse
They are not insects
They are arthropods
More specifically they are crustaceans
They are more closely related to lobsters than any insect
They can live 2 to 3 yrs
They carry their eggs in a pouch like a kangaroo and lay around 100 eggs at a time
They have 7 pairs of legs for a total of 14
Ok so there are some random facts for you about roll pollies. Do you have any rolly polly facts I left out? Do you know how rare my all white rolly polly is? I'd love to know more. Especially with all the unusually colored crustaceans turning up elsewhere it would be interesting to find out if my "pill bug" is another abnormality or just a natural part of it's life cycle.
As far as games go when using this for a lesson plan. I suggest just letting the kids loose in the yard with jars and let them catch all they can. Who didn't love doing that as a kid? You could do a snack to go with it of "ants on a log" and just call it rolly pollies on a log. I think raisins look more like rollie pollies than ants anyway.
Monday, July 15, 2013
Monday, July 8, 2013
Very Easy Dog Leash
A couple years ago a friend asked me to make her a dog leash. In exchange she sent me baby clothes I think. I don't really remember anymore. I didn't have blog at the time but I did still publish and share a tutorial for how to make these super simple leashes. They are just like what you buy in the store only they cost a fraction of the price and you can customize them anyway you want. I have the original pictures on my external hard drive but as I am lazy right now I don't feel like going to get them to post the full tutorial here. Instead I'll post the link over to my instructibles page where you can view the full tutorial which is really only like two steps. Yes, it's that easy! Click here to learn how.
In the tutorial I kept it simple for any beginners out there but you can easily add a ribbon to these as well. This is a great first sewing project as it takes very little cutting, very little investment, and very little work. It is nearly instant gratification.
Monday, June 24, 2013
Home style Chicken Recipe
Oops time got a away from me. It's a been a little more then a week between my posts. Well to make up for it here is a keeper of a recipe for my home style chicken. I don't really know what else to call it other then that. This rub is one I can proudly say I came up with. Although I'm sure someone somewhere has used it before me. It may even have a name. If it does feel free to share it with me and I'll correct this post. ;-)
It can be used on boneless or bone in chicken. You would just need to adjust the cooking time and temp accordingly.
Ingredients
- 2 lbs Chicken Legs (around 10 legs)
- Olive oil
- 2 Tsp Paprika
- 2 Tsp Garlic Powder
- 1 Tsp Onion Powder
- 1 Tsp Salt
- 1/4 Tsp Black Pepper
First preheat oven to 400F. Get a glass pan large enough
for your chicken and use the olive oil to grease your pan. Lay out your
chicken in the pan not to tightly packed.
Mix together your seasonings
in a small cup or dish and then evenly sprinkle over all your chicken.
Cover with tin foil and place in preheated oven. Cook for 30min then
remove tinfoil and bake for another 15min. Please note that cooking
times may vary depending on your oven. In our old apartment this temp
and cooking time was perfect. However in our house I have to cook this
for an additional 10 minutes.
This isn't the prettiest picture but oh man is this good! You won't be disappointed. Please let me know if you try this out. I'd love to hear your comments.
Do you have a favorite go to chicken recipe? I'm always looking for new things to try. Feel free to share yours or even a link to it in the comments below. :-)
Saturday, June 15, 2013
The itsy bitsy spider skirt tutorial
I got this great organic itsy bitsy spider fabric in a fabric grab bag from one of my favorite fabric websites (and no they don't pay me to say that, lol). It was a great surprise since my daughter loves spiders and her favorite color is purple. This fabric by itself was a little dull. So I decided to pair it with some very bright purple fabric that has a damask design on it. The pink in the middle is a super soft piece of 1 1/2" band elastic that also came from that grab bag.
First you need you waist measurement and your length measurement from hip to were you want the finished skirt to fall on the leg. It's simple to start just cute a rectangle the full width of your main fabric and the length you want it to be minus 3 inches . Then cut 2 pieces of fabric the full length of your trim fabric by 3 inches high. If you are using band elastic like the one I have hear it does not need to be encased so you don't need a seam allowance for the hem.
The picture above is what you should have sitting in front of you. Now you will need to sew the two trim pieces together at one end so you will have one very long piece of fabric. This is a good time to hem the bottom of your ruffle.
Next you will want to work on your ruffle. I use the two straight stitch method and then I pull one of the threads on the second stitch. If you use this method then your fabric will look like the picture below. Not sewn to anything else just two long running stitches. There are a lot of ways to make a ruffle though so do what works best for you. :-)
Once you get it all ruffled and even you can stitch it right now. It will then look like this.
I love the look of top stitching. I think it makes things look much nicer. If you like to iron then now is the time to do it. Then you can top stitch right above your ruffle. I did this in contrasting thread so you can see it better but you can use matching.
Now here is where I would change things. I pinned it straight to my elastic with the same middle of the middle method. However I did not do the running stitches to gather it up. I would highly recommend doing the running stitches and gathering it instead of just stretching the elastic to fit. That was very difficult to do and it made the stitching on my elastic band very wonky.
After your elastic band is stitched on you can simply stitch the two sides together and you have a completed skirt. Just like the one below.
If you have a tag you can add it on the inside or the outside of the band like I did.
Then pop it on your little model and admire your work. As you can see I embellished a little shirt to go with this. It's pretty simple. I just took an old shirt she had spilled juice on and stitched on some lace with wise then I did the ruffle lengthwise.Hooray! Goodbye stain!
First you need you waist measurement and your length measurement from hip to were you want the finished skirt to fall on the leg. It's simple to start just cute a rectangle the full width of your main fabric and the length you want it to be minus 3 inches . Then cut 2 pieces of fabric the full length of your trim fabric by 3 inches high. If you are using band elastic like the one I have hear it does not need to be encased so you don't need a seam allowance for the hem.
The picture above is what you should have sitting in front of you. Now you will need to sew the two trim pieces together at one end so you will have one very long piece of fabric. This is a good time to hem the bottom of your ruffle.
Next you will want to work on your ruffle. I use the two straight stitch method and then I pull one of the threads on the second stitch. If you use this method then your fabric will look like the picture below. Not sewn to anything else just two long running stitches. There are a lot of ways to make a ruffle though so do what works best for you. :-)
Now after I have my running stitches but before I ruffle I pin it to my main fabric lengthwise. I start by pinning one end, then the other, then I find the middles and pin those. Continue by pinning the middle of the middles and so on until it looks like mine does below. Just remember to pin the two right sides of the fabric together.
Once you get it all ruffled and even you can stitch it right now. It will then look like this.
I love the look of top stitching. I think it makes things look much nicer. If you like to iron then now is the time to do it. Then you can top stitch right above your ruffle. I did this in contrasting thread so you can see it better but you can use matching.
Now here is where I would change things. I pinned it straight to my elastic with the same middle of the middle method. However I did not do the running stitches to gather it up. I would highly recommend doing the running stitches and gathering it instead of just stretching the elastic to fit. That was very difficult to do and it made the stitching on my elastic band very wonky.
After your elastic band is stitched on you can simply stitch the two sides together and you have a completed skirt. Just like the one below.
If you have a tag you can add it on the inside or the outside of the band like I did.
Then pop it on your little model and admire your work. As you can see I embellished a little shirt to go with this. It's pretty simple. I just took an old shirt she had spilled juice on and stitched on some lace with wise then I did the ruffle lengthwise.Hooray! Goodbye stain!
Friday, June 7, 2013
How to mount a carved stamp
I may eventually do a post about carving stamps but there are a ton of those out there already. This post is going to focus on mounting a stamp you've already carved.
Why do I want to mount a carved stamp? Well because I saw this wonderful picture on pinterest about how this woman used a bee stamp to stamp gold bees on her wall and I fell instantly in love. (I wish I could find the pin but for some reason I can't find it. If I stumble across it again I'll update this post.) From that moment I realized I want to decorate my kitchen in bees. Lol, I know I'm silly but I have come to really love bees lately. I love that we have honey bees and bumble bees all around our house. It is so lovely seeing them gently buzz past. They never give us any trouble. So anyway back to my kitchen. I decided I had to stamp gold bees along the trim in my kitchen.
The woman posted a link to a site she bought her bee stamp from but it was like $30 to buy a stamp that was something like 3" x 5" and that wasn't even including shipping. Plus they were based in the UK and may not even ship to the US. So I knew that particular stamp was out of the picture.
So I hunted the internet for the perfect bee stamp. I didn't want anything cartoon-ish and I didn't want anything to small. I was thinking something that looked like it was from an old scientific journal and was around the same size as her stamp but bigger would have been fine. I searched ebay, etsy, amazon, joann's fabric, and micheal's. You wouldn't believe how difficult it is to find a big bee stamp. I didn't think I was being overly picky. So I did the only thing I could decided to carve it myself. I figured it would pay off in the long run anyway and then I could make any stamp I want.
So I freehand drew the bee stamp I wanted, the size I wanted and went from there.
Here is my stamp after I carved it out of my "grey stuff". I went to our local hardware store and bought a floor sample block for .27 and some gorilla glue. Now mind you I recommend using super glue instead now. The gorilla glue expands and makes it puffy and it takes 24 hours to dry. The little tubes of super glue take less than a minute to dry and it doesn't expand. Just make sure you get a big tube because you will use a lot of it if you are doing more then one stamp.
The floor samples are perfect for stamp mounts. I feel like they look all fancy and expensive with the pretty natural wood. Although some of the floor samples are more like particle board with a foam like cushion on them. These have worked well for me too but I'm still not sure how long that particle board will hold up. Plus it's not as pretty. It does work though.
Have you ever carved a stamp before? Did you mount it? What do you think of my freehand bee? I think he's pretty cute but I could be biased. ;-)
Why do I want to mount a carved stamp? Well because I saw this wonderful picture on pinterest about how this woman used a bee stamp to stamp gold bees on her wall and I fell instantly in love. (I wish I could find the pin but for some reason I can't find it. If I stumble across it again I'll update this post.) From that moment I realized I want to decorate my kitchen in bees. Lol, I know I'm silly but I have come to really love bees lately. I love that we have honey bees and bumble bees all around our house. It is so lovely seeing them gently buzz past. They never give us any trouble. So anyway back to my kitchen. I decided I had to stamp gold bees along the trim in my kitchen.
The woman posted a link to a site she bought her bee stamp from but it was like $30 to buy a stamp that was something like 3" x 5" and that wasn't even including shipping. Plus they were based in the UK and may not even ship to the US. So I knew that particular stamp was out of the picture.
So I hunted the internet for the perfect bee stamp. I didn't want anything cartoon-ish and I didn't want anything to small. I was thinking something that looked like it was from an old scientific journal and was around the same size as her stamp but bigger would have been fine. I searched ebay, etsy, amazon, joann's fabric, and micheal's. You wouldn't believe how difficult it is to find a big bee stamp. I didn't think I was being overly picky. So I did the only thing I could decided to carve it myself. I figured it would pay off in the long run anyway and then I could make any stamp I want.
So I freehand drew the bee stamp I wanted, the size I wanted and went from there.
Here is my stamp after I carved it out of my "grey stuff". I went to our local hardware store and bought a floor sample block for .27 and some gorilla glue. Now mind you I recommend using super glue instead now. The gorilla glue expands and makes it puffy and it takes 24 hours to dry. The little tubes of super glue take less than a minute to dry and it doesn't expand. Just make sure you get a big tube because you will use a lot of it if you are doing more then one stamp.
The floor samples are perfect for stamp mounts. I feel like they look all fancy and expensive with the pretty natural wood. Although some of the floor samples are more like particle board with a foam like cushion on them. These have worked well for me too but I'm still not sure how long that particle board will hold up. Plus it's not as pretty. It does work though.
Have you ever carved a stamp before? Did you mount it? What do you think of my freehand bee? I think he's pretty cute but I could be biased. ;-)
Saturday, June 1, 2013
Potato and Sausage Casserole
This is one of our favorite dishes in our house. It always comes out perfect and it always tastes amazing. It's perfect no matter what the weather but it looks exceptionally nice during fall. I adapted it from this recipe here. Although you'll notice I've changed quite a few things.
Now keep in mind that when I make this I am making it to feed a small army. There are 6 of us who eat on this and this is how much I make so we have left overs the next day! If you have smaller herd to feed then I suggest cutting this recipe in half. Which should be pretty simple.
Ingredients:
Two packages of sausage
Potatoes (I like to use a variety like gold, red, purple, and whatever else come in the medley bags from Trader Joe's.)
Sweet potatoes
Onions
Bell peppers (yellow, orange, and red are beautiful and excellent together in this)
Sea salt
Pepper
Italian herbs
Red wine vinegar
Olive oil
Curry powder
Garlic Salt
Onion powder
Plus whatever veggies you may want to add in extra. The blogger I got this from also added things like baby carrots and fennel to hers.
I know some ingredients might seem redundant but I assure you it all has it's place and comes together in perfect harmony.
First chop up your potatoes, onions, sweet potatoes and whatever else you decided to add as extra. Wait on the bell peppers for now though.
Drizzle just a little olive oil in a glass pan and then toss them all in.
Yumm, looks good already! Now you need to start on the seasonings. Mix 1/2 cup of water with a 1 teaspoon of olive oil, 1 teaspoon curry powder, 2 teaspoons garlic powder, teaspoon onion powder, 1 teaspoon sea salt, a few cranks of fresh ground pepper, 1 and 1/2 tsp Italian herbs, and 4 table spoons red wine vinegar. Mix it all and then drizzle over your chopped veggies.
Now cover the glass pan with tin foil and pop that baby in the oven for 45 min at 450. In my experience it is always perfect at this temp for that amount of time. However you are looking for your potatoes to be fork tender. Although the sweet potatoes start out super hard they will be the softest at this point so check something other then a sweet potato.
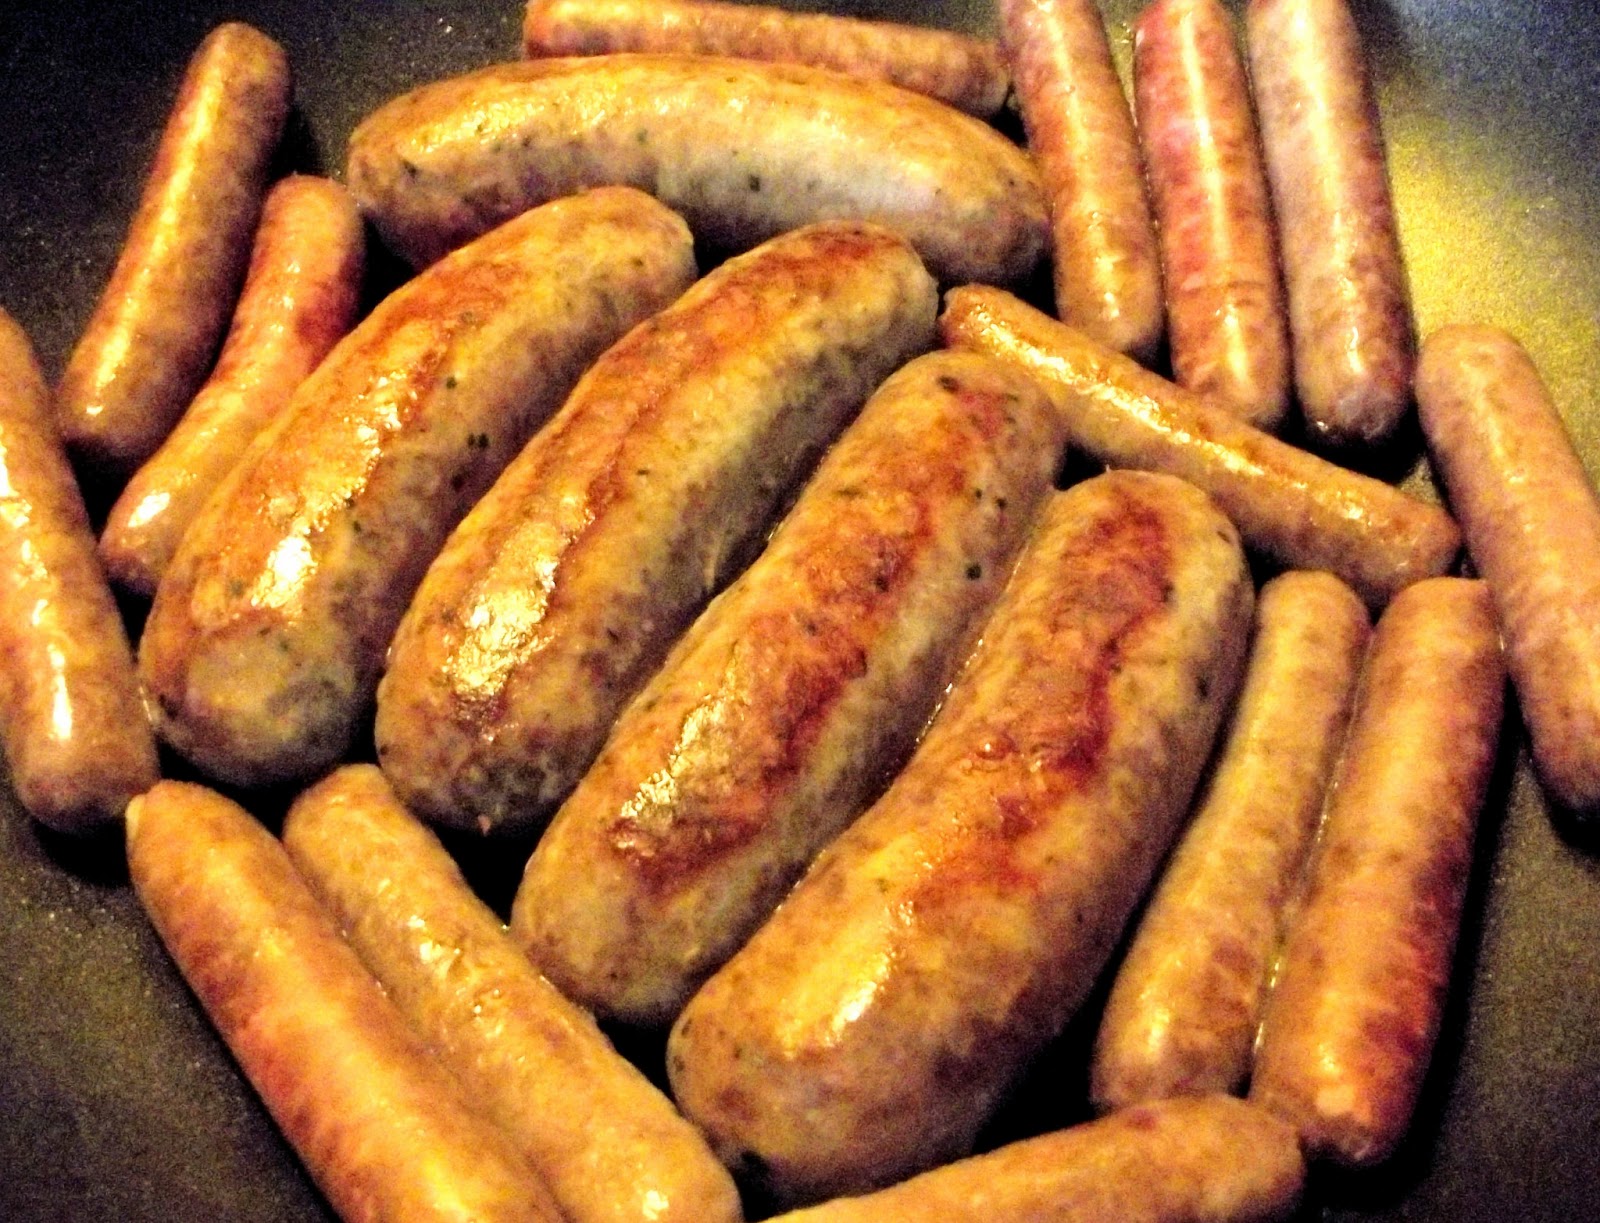
While those are cooking in the oven I start on the sausage. I like to use sweet Italian brauts and one package of fresh breakfast links (Not the ones from the freezer section). My husband likes the variety and the smaller ones are easier for the kids to eat. Sometimes I use the maple ones and sometimes just regular. While I like maple sausage I do not like eating the maple ones in this. However my husband and kids really enjoy them in this. I stick to the brauts though.
These should brown on the outside but they don't need to be thoroughly cooked. They will cook more in the oven.
Cut the larger sausages in half and when your veggies have finished getting their bake on pull them out. Carefully remove the tinfoil and put the sausages on top. Then pop it back in the oven uncovered for another 15 minutes.
While that's cooking cut up your bell peppers. When the 15 min are up cover your casserole with the bell peppers and put it back in for another 15 mins. I like my peppers to still be pretty crisp but if you like them more cooked then by all means add them earlier.
It should look like this when it's done and your house will smell like pure wonderment. :-)
If you try this I would love to hear your opinions on it. I'd also love to know what if anything you change. I love to tweak recipes. Although I think this one is pretty close to perfection. ;-)
Now keep in mind that when I make this I am making it to feed a small army. There are 6 of us who eat on this and this is how much I make so we have left overs the next day! If you have smaller herd to feed then I suggest cutting this recipe in half. Which should be pretty simple.
Ingredients:
Two packages of sausage
Potatoes (I like to use a variety like gold, red, purple, and whatever else come in the medley bags from Trader Joe's.)
Sweet potatoes
Onions
Bell peppers (yellow, orange, and red are beautiful and excellent together in this)
Sea salt
Pepper
Italian herbs
Red wine vinegar
Olive oil
Curry powder
Garlic Salt
Onion powder
Plus whatever veggies you may want to add in extra. The blogger I got this from also added things like baby carrots and fennel to hers.
I know some ingredients might seem redundant but I assure you it all has it's place and comes together in perfect harmony.
First chop up your potatoes, onions, sweet potatoes and whatever else you decided to add as extra. Wait on the bell peppers for now though.
Drizzle just a little olive oil in a glass pan and then toss them all in.
Yumm, looks good already! Now you need to start on the seasonings. Mix 1/2 cup of water with a 1 teaspoon of olive oil, 1 teaspoon curry powder, 2 teaspoons garlic powder, teaspoon onion powder, 1 teaspoon sea salt, a few cranks of fresh ground pepper, 1 and 1/2 tsp Italian herbs, and 4 table spoons red wine vinegar. Mix it all and then drizzle over your chopped veggies.
Now cover the glass pan with tin foil and pop that baby in the oven for 45 min at 450. In my experience it is always perfect at this temp for that amount of time. However you are looking for your potatoes to be fork tender. Although the sweet potatoes start out super hard they will be the softest at this point so check something other then a sweet potato.
While those are cooking in the oven I start on the sausage. I like to use sweet Italian brauts and one package of fresh breakfast links (Not the ones from the freezer section). My husband likes the variety and the smaller ones are easier for the kids to eat. Sometimes I use the maple ones and sometimes just regular. While I like maple sausage I do not like eating the maple ones in this. However my husband and kids really enjoy them in this. I stick to the brauts though.
These should brown on the outside but they don't need to be thoroughly cooked. They will cook more in the oven.
Cut the larger sausages in half and when your veggies have finished getting their bake on pull them out. Carefully remove the tinfoil and put the sausages on top. Then pop it back in the oven uncovered for another 15 minutes.
While that's cooking cut up your bell peppers. When the 15 min are up cover your casserole with the bell peppers and put it back in for another 15 mins. I like my peppers to still be pretty crisp but if you like them more cooked then by all means add them earlier.
It should look like this when it's done and your house will smell like pure wonderment. :-)
If you try this I would love to hear your opinions on it. I'd also love to know what if anything you change. I love to tweak recipes. Although I think this one is pretty close to perfection. ;-)
Thursday, May 23, 2013
Best Corn You've Never Had!
It is now perfect cookout weather. So I of course have to share my super awesome amazing corn on the cob. We look forward to this each year and corn on the cob is one of my kids favorite foods. Yep, you read that right. My kid's favorite food is a vegetable. All four of them.
This corn recipe is simple and once you try it the contest will be over. It will be the star of any bar-b-q and it will become the standard you compare all other corn too. That's a pretty big promise but this corn is awesome and I'm pretty sure you'll agree.
Now one thing you should know about me is when it comes to corn I am a bit of a butter fiend. I can easily go through half a stick of butter with just one cob. However with this method I use NO butter. OMG! I know I can hear your disbelief. I used to think corn had to have butter too. In fact the first few times I made this I still used butter on it. Until I realized it didn't really add anything taste wise.
Here's how you make it.
Peel back the husks while keeping them as intact as possible. I usually remove any ratty or really dry looking ones from the outermost layer but this shouldn't be more then a couple leaves. After you've carefully peeled them down remove the silk. I find it easiest to grab the nasty wad of silk at the very top and then pulling it off down toward my other hand and then away from the corn. This leaves you with not to many stray strands that you can quickly rub away.
Don't forget to wash it off now!
Now for this step I recommend being outside and not upwind of anyone you like. Sprinkle your corn liberally with lemon pepper. It might sound like an unusual combination but TRUST me on this. Rotate it as you sprinkle so you can get it on all sides.
Once you feel you have enough lemon pepper on your corn just wrap those leaves back around it. You don't need to tie it up or anything. It stays together just fine in my experience.
Now pop that sucker on the grill and grill it baby! You do need to watch these because if your fire is going high it can catch the leaves fire. This happens to us sometimes but it's easy to blow out and really you shouldn't be leaving your grill unattended anyway.
When you corn husks look about like the one above you will know it is done. Usually this takes around 20 minutes. If we are limited on grill space we cook the rest of our food first and then let this cook while we eat. Our new grill is a little larger and has a top rack to it so we use that for the corn and it seems to do well up there. The corn itself actually gets quite a bit brighter in color when it's ready too. You might be able to see that by the little bit that is peeking through in the above picture. I would have a finished pic for you but these puppies are gone as soon as they come off the grill. It was all I could do to take a picture of this one before pulling it off the grill and devouring it.
If you try this I would love to hear what you think. Please tell me. I'm good about replying to comments so if you have any questions then just ask. :-)
This corn recipe is simple and once you try it the contest will be over. It will be the star of any bar-b-q and it will become the standard you compare all other corn too. That's a pretty big promise but this corn is awesome and I'm pretty sure you'll agree.
Now one thing you should know about me is when it comes to corn I am a bit of a butter fiend. I can easily go through half a stick of butter with just one cob. However with this method I use NO butter. OMG! I know I can hear your disbelief. I used to think corn had to have butter too. In fact the first few times I made this I still used butter on it. Until I realized it didn't really add anything taste wise.
Here's how you make it.
Peel back the husks while keeping them as intact as possible. I usually remove any ratty or really dry looking ones from the outermost layer but this shouldn't be more then a couple leaves. After you've carefully peeled them down remove the silk. I find it easiest to grab the nasty wad of silk at the very top and then pulling it off down toward my other hand and then away from the corn. This leaves you with not to many stray strands that you can quickly rub away.
Don't forget to wash it off now!
Now for this step I recommend being outside and not upwind of anyone you like. Sprinkle your corn liberally with lemon pepper. It might sound like an unusual combination but TRUST me on this. Rotate it as you sprinkle so you can get it on all sides.
Once you feel you have enough lemon pepper on your corn just wrap those leaves back around it. You don't need to tie it up or anything. It stays together just fine in my experience.
Now pop that sucker on the grill and grill it baby! You do need to watch these because if your fire is going high it can catch the leaves fire. This happens to us sometimes but it's easy to blow out and really you shouldn't be leaving your grill unattended anyway.
When you corn husks look about like the one above you will know it is done. Usually this takes around 20 minutes. If we are limited on grill space we cook the rest of our food first and then let this cook while we eat. Our new grill is a little larger and has a top rack to it so we use that for the corn and it seems to do well up there. The corn itself actually gets quite a bit brighter in color when it's ready too. You might be able to see that by the little bit that is peeking through in the above picture. I would have a finished pic for you but these puppies are gone as soon as they come off the grill. It was all I could do to take a picture of this one before pulling it off the grill and devouring it.
If you try this I would love to hear what you think. Please tell me. I'm good about replying to comments so if you have any questions then just ask. :-)
Subscribe to:
Posts (Atom)